Home Electrification: DIY Pre-requisites

Intro

As a homeowner, having a basic understanding of electrification is important to ensure the safety, functionality, and efficiency of your home’s electrical system. While it’s advisable to consult with licensed electricians for major electrical work, this article lists some key things you should know about electrification to ensure it’s done properly. Our friends at Bel Air Gutter and Siding gave us some advice along with some other contractors.

1. Electrical Safety:

  • Always prioritize safety when dealing with electricity. Never attempt electrical work if you’re not familiar with it.
  • Turn off the power at the circuit breaker before working on electrical outlets, switches, or fixtures.
  • Use appropriate personal protective equipment (PPE) when working with electricity.

2. Electrical Codes and Regulations:

  • Familiarize yourself with local electrical codes and regulations. They are in place to ensure safe and proper electrical installations.
  • Electrical work often requires permits and inspections. Make sure to follow the necessary legal requirements.

3. Hiring Qualified Professionals:

  • For any significant electrical work, hire licensed and experienced electricians.
  • Check references, reviews, and credentials of electricians before hiring them.

4. Understanding Your Electrical Panel:

  • Know the location of your main electrical panel and how to shut off power in case of emergencies.
  • Understand the purpose of circuit breakers and how to reset them.

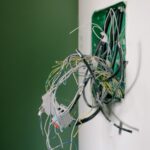
5. Outlets and Wiring:

  • Learn about the types of electrical outlets in your home (standard, GFCI, AFCI) and their functions.
  • Understand the basics of electrical wiring, such as hot, neutral, and ground wires.

6. Overloading Circuits:

  • Understand the concept of electrical load and avoid overloading circuits by plugging too many devices into a single outlet or circuit.
  • Use power strips with built-in circuit breakers to prevent overload.

7. Extension Cords:

  • Use extension cords only for temporary solutions, not as a permanent source of power.
  • Ensure that extension cords are rated for the intended use and not damaged.

8. GFCI and AFCI Protection:

  • Know the importance of Ground Fault Circuit Interrupter (GFCI) outlets in areas prone to water exposure and Arc Fault Circuit Interrupter (AFCI) protection for preventing electrical fires.

9. Outdoor Wiring:

  • If you have outdoor outlets, ensure they are weatherproof and have proper covers.
  • Use outdoor-rated extension cords and equipment for outdoor use.

10. Light Bulbs:

  • Use the appropriate wattage light bulbs for fixtures to prevent overheating and fire hazards.

11. Energy Efficiency:

  • Consider energy-efficient lighting and appliances to reduce energy consumption and lower utility bills.

12. Signs of Electrical Problems:

  • Be aware of signs of electrical issues such as flickering lights, tripped breakers, burning odors, or sparking outlets. Address these problems promptly.

13. Grounding:

  • Understand the importance of grounding in preventing electrical shocks and ensuring the safety of your electrical system.

14. DIY Limitations:

  • Know your limitations when it comes to DIY electrical work. Simple tasks like changing light fixtures or outlets may be manageable, but more complex work should be left to professionals.

Summary

Remember that electricity can be dangerous if not handled correctly. If you’re unsure about any aspect of electrification, it’s best to consult with a licensed electrician. Staying informed and proactive about your home’s electrical system will help ensure the safety and functionality of your living space.

Waterproofing Your Basement – The Best DIY Guide

Unfortunately, too many people have issues with moisture in their basements and need information on waterproofing their basements. Since you are here, this means you are probably having issues as well and now you are considering how to waterproof your basement walls.

So, how would you go about the whole process? Follow these tips and keep your basement warm and dry all year round.

Find Out the Water Source

Due to concrete’s porous nature, you might easily be able to find wet streaks along cracks, between the mortar joints (assuming you have concrete block walls), at the corners of the windows, and around the pipes (e.g., sewer pipes or a water supply line).

basement

But if the whole surface of the wall is wet, you will have to do a condensation test. First dry any area of the wall using a rag and attach a piece of aluminum foil (one-foot square) to that area with duct tape.  After 24 hours, peel off the aluminum foil and see how the bottom of the foil feels. If wet, water must be seeping through your basement wall from outside.

Use Hydraulic Cement to Fill Cracks

Cracks are often found at the bottom of basement walls where the wall meets the footing. The footing of the foundation is poured first and then either a cement wall is poured on top once the footing hardens or a concrete block wall is laid on the footing. Because it is two separate pieces, leaks can happen at that joint between the wall and the footing.

This construction method could create a weak spot – known as a cold joint – that you can fill with hydraulic cement. We are recommending hydraulic cement because it has the ability to push deep into the crack or crevice and form an effective watertight bond by expanding.

Keep Window Well Leaks in Mind

Window wells are often the culprit behind a basement wall leak because they could retain water in case there is no drainage system installed underneath. If you think installing a proper window well drainage system is not possible, dig around two feet lower in the area and fill it with gravel so rainwater cannot stand in the area.

Now get a caulk used on masonry and apply it around the window. You could also purchase a sloped window well cover and install it to keep rainwater at bay. 

Apply Masonry Waterproof Coating to Bare Interior Basement Walls

What if the foil test showed that the water was soaking through the basement walls? In such a scenario, you will need a quality waterproof paint to seal the walls. Roll or brush the paint on and keep it thick enough to fill the tiny surface holes. Then let it completely dry before you apply second coating.

Follow Other Procedures to Keep Your Basement Free from Water

It is sometimes easy to tackle wet basements. A really important thing is to make sure that the ground is sloped to lead water away from the house. That may mean you need to do some grading, but that can be much cheaper than having to dig around your house to put a coating on the exterior of your basement walls. Also pay attention to the foundation plantings like flowerbeds and bushes that could allow water to seep in your basement. Also, repair downspouts and guttering to make sure they are effectively directing water away from your house. As you can see, waterproofing a basement is not supposed to be a costly procedure. You can go DIY with these tips and avoid hiring a professional to do the same for you.

Issues with Insulation

There are different types of insulation and different ways to install the insulation. Also, there are different places you should insulate.

If you use your attic for storage and have the floors covered in plywood, that is a problem. That is because the flooring limits the amount of insulation you can put in the attic. So you might need to take up the plywood and find someplace else for what you are storing.

Types of Insulation

The two most common types of insulation are loose fill and batts, also known as blanket type. Most people are familiar with these two types but few are aware of radiant barrier foil insulation. This foil type insulation uses different properties than traditional insulation to provide insulation.

Loose fill Insulation

In some cases this is spread around by hand, but typically it is blown in with a machine. There are certain situations where it makes more sense to use this type:

  • When there are areas that are hard to get to because of obstructions, etc.
  • When the joists are not the standard width
  • When you are adding insulation on top of existing insulation because it will fill in any gaps
  • When there is little headroom to work in

Loose fill can be of three types, fiberglass, cellulose or mineral wool. Fiberglass is lighter but you need more of it. Cellulose is common but if it gets damp, it can rot. The mineral wool costs a bit more but has natural fire resistance since it is made from rock or slag fibers.

Batt Insulation

You may remember seeing ads for this with the Pink Panther. The reason is that it comes in rolls 16″ or 24″ wide with pink fiberglass attached to paper and foil backing. In addition, it comes in different thicknesses which have different R values. An R value is a measure of insulation effectiveness.

It is best to use this in the opposite situation of the blown-in loose insulation. In other words, when the joist spacing is standard, there is easy access to the attic space, and there is enough headroom.

Radiant Barrier Solar Attic Foil

Heat is transmitted by conduction, convection or radiation. Infrared radiation heats up the roof of your house. Then through convection and conduction the air in your attic heats up which then transmits the heat down into your house.

Regular insulation works by having lots of little air pockets and reducing air movement so convection has less of an impact. But if it gets hot, it can still transmit heat by convection. So, what to do? You can take care of the problem by using a radiant foil barrier. It is basically a large sheet of aluminum foil with thousands of little holes in it so it won’t trap moisture. Aluminum reflects 97% of radiant heat. Only silver and gold foil reflect more at 98 and 99%.

By putting the foil insulation on top of the other insulation most of the radiant heat reflects back into the attic. The top of the regular insulation is 20-30 degrees cooler that it would be without the foil. That means less heat transfers into the house and you don’t have to run the air conditioning nearly as often.

You can think about the difference on a hot day when the sun is out. If you stand in the sun, you can feel the radiant heat. If you stand in the shade, even though the temperature is the same, you feel cooler because you are only being heated by convection from the air and not radiant heat from the sun as well.

Wall Insulation

If you are building a home or completely remodeling and have taken down the interior walls, you can staple batts of insulation in between the joists. Otherwise, you will have to blow in the insulation.

If you have an older house, you might want to check to see if you have any insulation in the walls. Energy used to be so cheap that people didn’t bother with insulation. If you have to add insulation, it is not a fun project.

You have to cut a circular hole near the ceiling and one near the floor. You need two holes because the pressure of blowing in the insulation could blow out the wallboard if you didn’t have a place for air to get out.

The bad part is that you have to cut the two holes every 16 inches in the walls around the outside of your house on all floors. The reason is that the studs, which are every 16 inches, keep the insulation from going sideways, just up and down in that narrow area. Then you have to take the circles of wallboard and plaster them back in place and then repaint all the walls. Not a cheap process, but usually worth it for the extra insulation and lower heating bills.

For more useful information, click here.

Hello Homeowners and Purchasers!

The crane on top of the building is a bit over the top. We doubt you will be using something like that unless you are a multi-millionaire and building a building with a penthouse on top for yourself. But, we thought it was a fun photo.

We plan to give you tips that will help you in any building projects you might have. We also plan to give you some ideas you can use or warn you away from mistakes.

Are you remodeling a kitchen, a bathroom? Perhaps adding a deck? Or are you going full out and adding an addition to your house? If any of those are true, we hope to be able to help you with your endeavors.